Single Sign-On - Azure AD
Before configuring Azure AD as an identity provider for your Jetstream team, ensure that you have verified your organization's domain ownership.
You can set up Single Sign-On (SSO) for your Jetstream team using Azure AD as an OpenID Connect (OIDC) provider or as a SAML provider.
Configure Azure AD for OIDC SSO
Add SSO provider in Jetstream
Choose "Add SSO Provider" from your Team Dashboard and select "OIDC" as the provider.
Take note of your redirect URL, which will be used in subsequent steps.
Register an application in Microsoft Entra ID
To connect your Azure AD tenant as an identity provider, you must create an OIDC application.
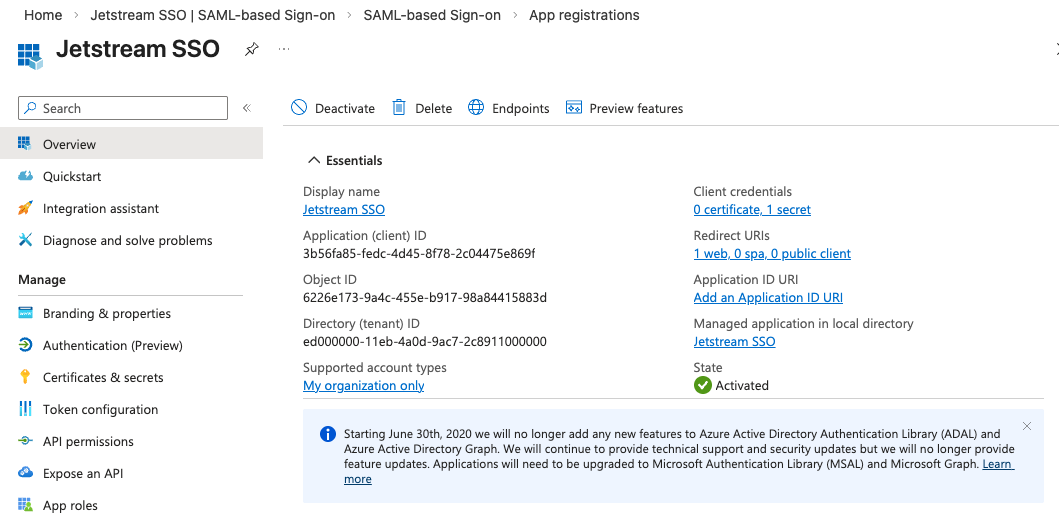
Go to the Microsoft Entra admin center and select App registrations from the left-hand navigation.
Refer to Microsoft's documentation on how to register an application in the Microsoft Entra ID to create a new application.
Your redirect URL is displayed in the Team Dashboard when adding the SSO provider. It will be in the format:
https://getjetstream.app/api/auth/sso/oidc/{uuid}/callback
After you create your application, copy the Application (client) ID and Directory (tenant) ID from the app's overview page. You will use these to configure the connection in Jetstream.
Create a Client Secret
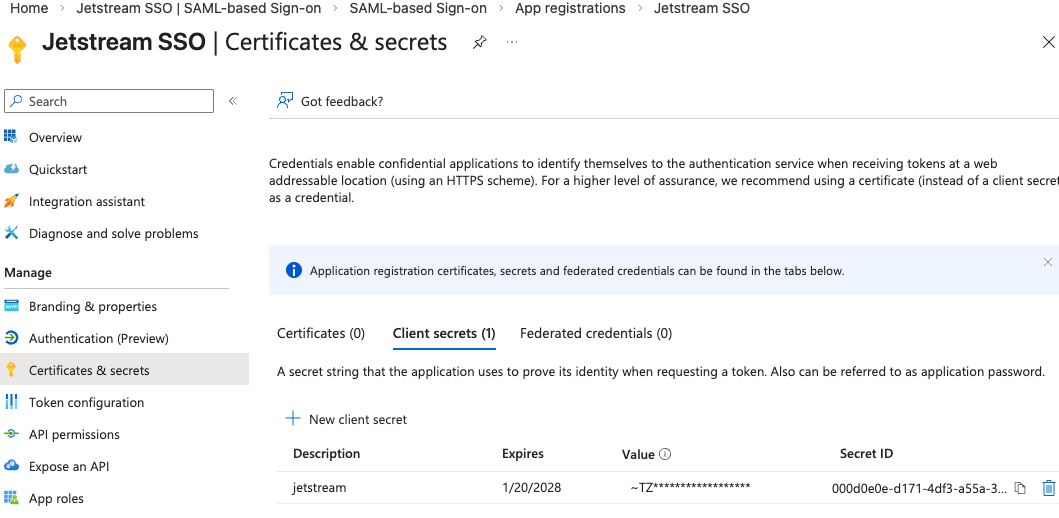
After registering your application, navigate to Certificates & secrets in the left-hand menu of your app registration.
Choose New client secret to create a new secret and choose your desired expiration period.
Copy this value as you will need it to configure the connection in Jetstream.
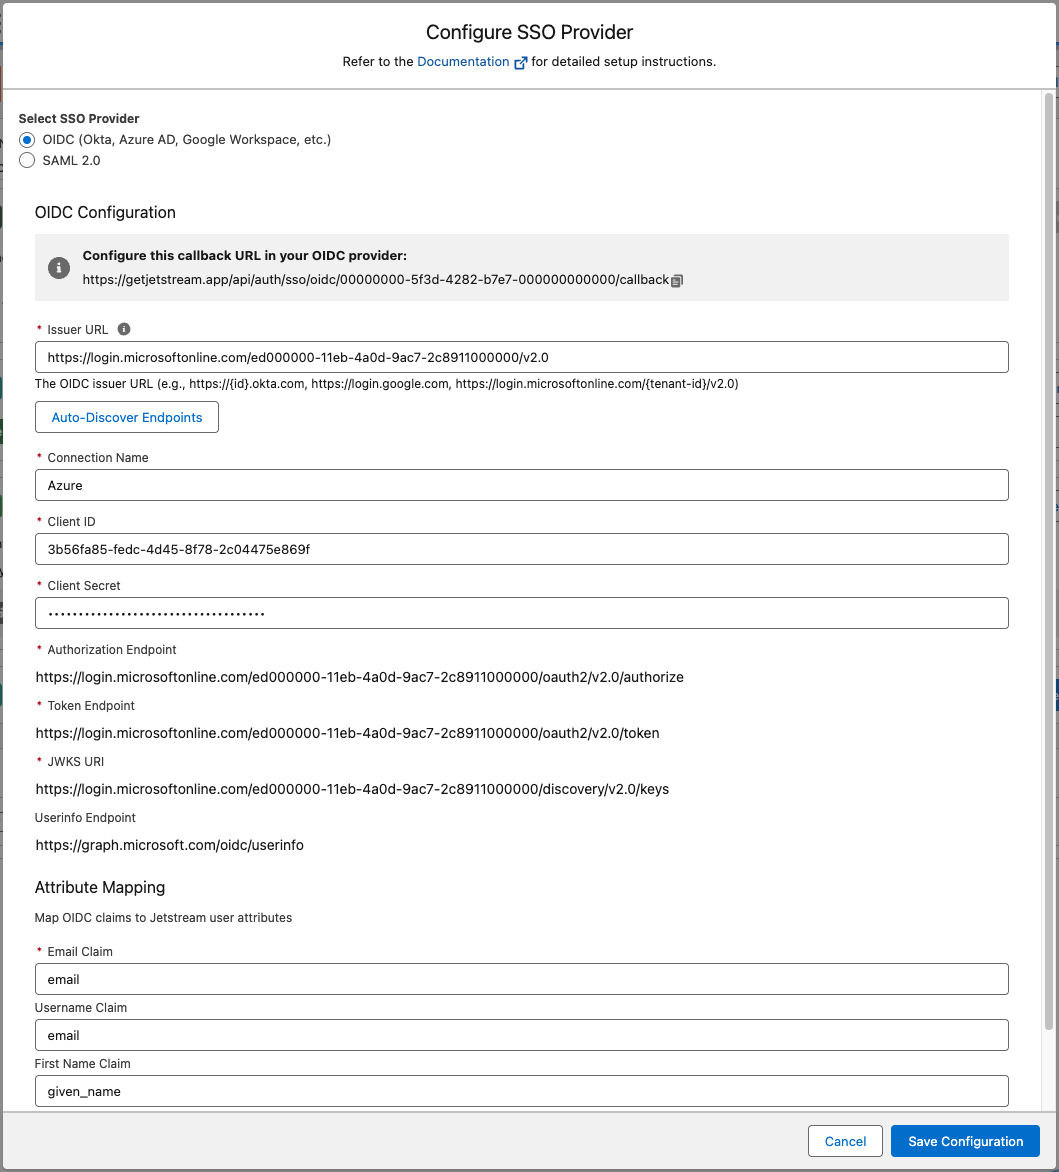
Configure Jetstream Connection
Enter https://login.microsoftonline.com/{tenantId}/v2.0 as the Issuer URL and click "Auto-Discover Endpoints".
Your tenant ID can be found in the app registration overview page.
Enter the Client ID and Client Secret obtained from the Microsoft Entra ID into the corresponding fields in the Team Dashboard when adding the SSO provider.
Enable the connection
After saving the connection, make sure to check the "Enable SSO" checkbox to enable SSO for your team.
You can optionally allow users with specific roles to bypass SSO, by default this is enabled for administrators.
Enable IdP-Initiated Login (Optional)
To allow users to launch Jetstream directly from the Microsoft Entra ID app launcher (My Apps portal), you can configure a redirect URI for the application.
Copy the Initiate Login URI shown in the Jetstream Team Dashboard SSO configuration. It will be in the format:
https://getjetstream.app/api/auth/sso/oidc/{uuid}/initiate
In your app registration under Authentication, add this URL as an additional redirect URI. Then, under Branding & properties, set the Home page URL to this same URL so users clicking the Jetstream tile in the My Apps portal are logged in automatically.
Configure Azure AD for SAML SSO
Add SSO provider in Jetstream
Choose "Add SSO Provider" from your Team Dashboard and select "SAML" as the provider.
Create an application in Microsoft Entra ID
Go to the Microsoft Entra admin center and select Enterprise apps from the left-hand navigation.
Choose + New application and then Create your own application.
Choose a name for your application (e.g. Jetstream SSO) and select "Integrate any other application you don't find in the gallery (Non-gallery)" and click Create.
Assign users and groups to the application
If you want Jetstream to be available for all users, Go to Manage > Properties, set "User assignment required?" to No and click Save.
Otherwise, you can assign specific users or groups to the application to restrict access to Jetstream.
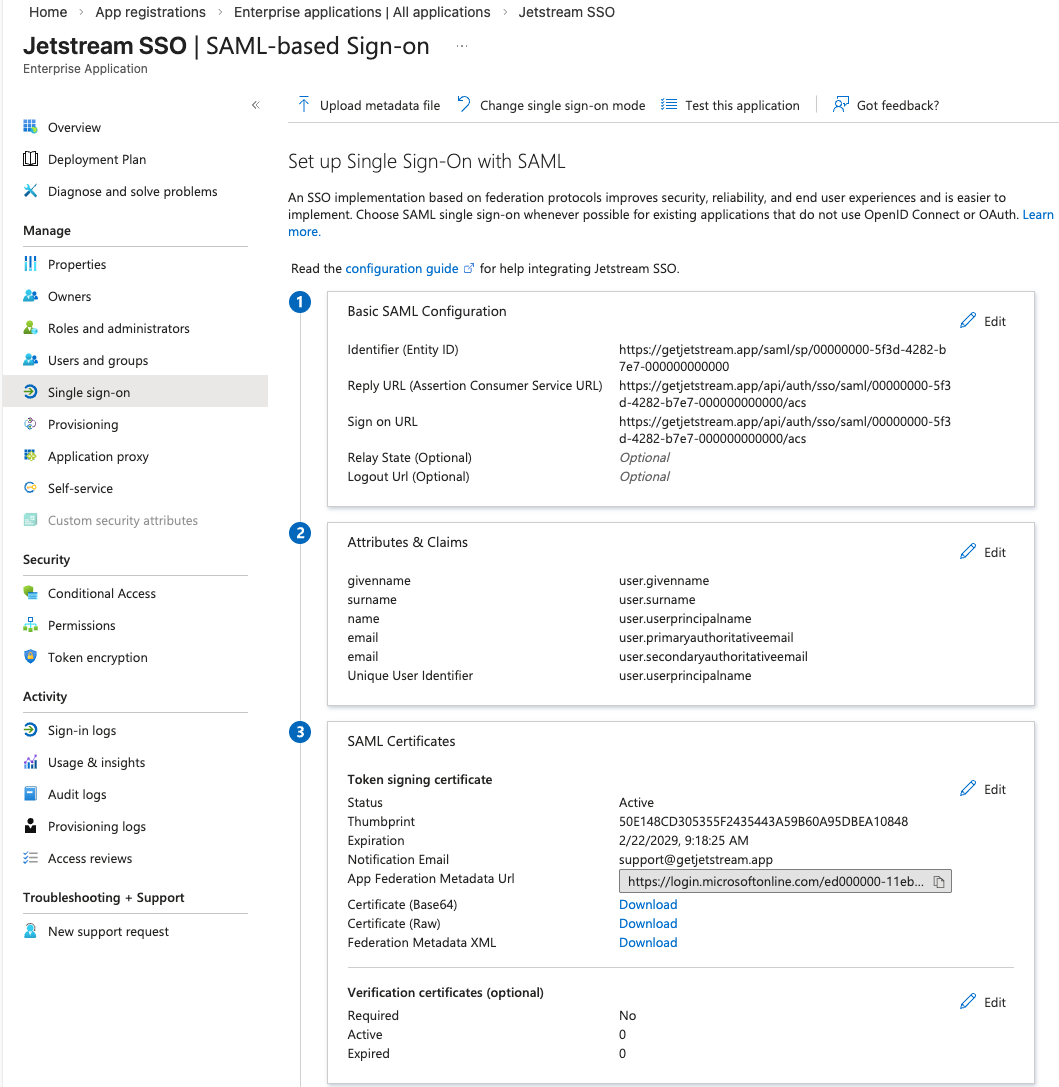
Enable Single Sign-On with SAML
Click Single sign-on and choose the SAML option.
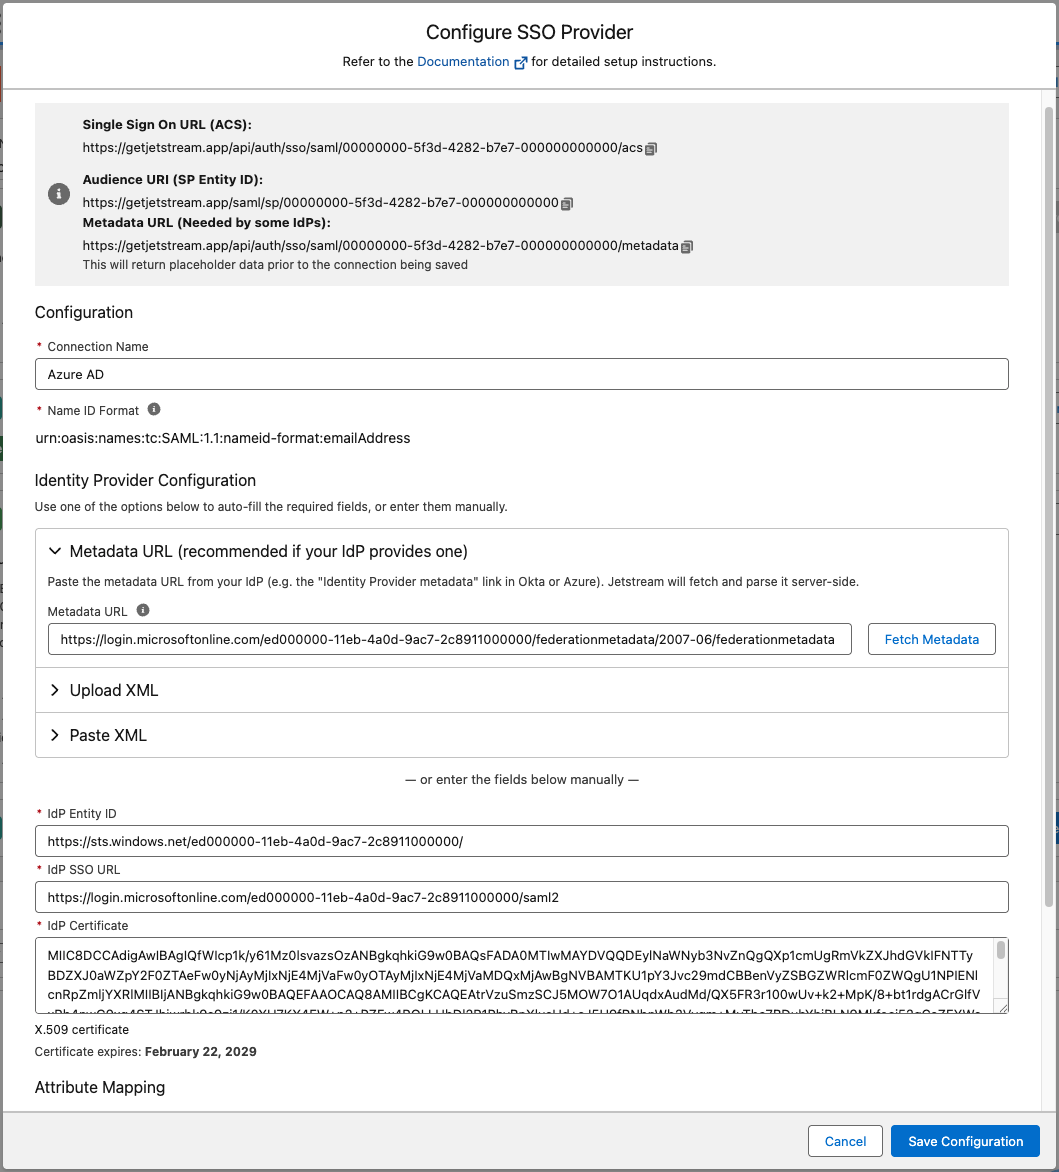
In the Basic SAML Configuration section, click Edit and fill in the following fields:
- Identifier (Entity ID): Use the value found in the SAML configuration modal within Jetstream.
Audience URI (SP Entity ID) - Reply URL (Assertion Consumer Service URL): Use the value found in the SAML modal within Jetstream.
Single Sign On URL (ACS) - Sign on URL: Use the value found in the SAML modal within Jetstream.
Single Sign On URL (ACS)
In the SAML Certificates section, copy the App Federation Metadata Url and paste it into the Metadata URL field in Jetstream and click "Fetch Metadata". This will automatically populate the necessary fields for your SAML connection in Jetstream.
Save your changes in the Microsoft Entra admin center.
Configure Jetstream Connection
Azure AD uses namespaces in its SAML configuration which requires a slightly different configuration in Jetstream.
When you click "Fetch Metadata" in Jetstream, it should automatically detect the necessary namespace and populate the fields accordingly.
But you may need to adjust the attribute mapping in Jetstream to match the claims sent by Azure AD.
Save the SAML configuration in Jetstream.
Enable the connection
After saving the connection, make sure to check the "Enable SSO" checkbox to enable SSO for your team.
You can optionally allow users with specific roles to bypass SSO, by default this is enabled for administrators.